How to photograph a wedding. Warning, long post!
Lately I have been trying to give helpful tips for photographers, ranging from the gear needed to shoot weddings professionally, my non-photography wedding kit, and are you ready to shoot your first wedding. The next step in my advice would be, obviously, how to photograph a wedding and the flow you may be able to expect.
I am working on adding photos to demonstrate how I do it. Stay tuned while I continuously add images.
I am going to try to refrain from reiterating some of my previous posts linked above, and I am a firm believer there is more than one way to do any particular task. This is how I try to prepare and shoot a wedding that I think may be able to help others.I will also try to keep this photography related, and not get into consultations to delivering finished work. People write books on this subject, so everything I am saying here is the tip of the iceberg, but I hope it helps.
First things first – getting ready.
Getting ready for a wedding has a large range of responsibilities, and are an integral part of being prepared for the day. Here are some things that I do to get ready.
- Charge batteries: Obviously you made sure you had enough batteries (at LEAST 2 per camera), but batteries do you no good if they aren’t charged. This also goes for any other batteries you may have, from AA’s for your flash, rechargeable strobe batteries, or ones for your wireless triggers. Always make sure you have backup batteries close by as well, in case your “fully charged” ones refused to fully charge.
- Scout the location: I will do this for certain locations if I am unfamiliar with the layout or need to know what equipment I will need. Luckily, I bring all of my gear to each wedding, but when I was starting out I needed to know if there were things that I needed to rent (again, obviously you have backup gear if you are shooting a wedding, but you may need a strobe of a few faster lenses to deal with the particular lighting situation). If it is too far away, or you are stuck for ideas, it is always fine to check them out on your favorite search engine or social media site.
- Clean/check your gear: Its the worst feeling when you show up to a wedding and find out you forgot a key piece of equipment, or the lens wont focus or camera wont take a photo. A quick once over with a lens cloth and rocket blower will not only make sure your equipment is fresh and clean, but also to remind you that you left your favorite lens in a different bag so you can put it back away. It is also not a bad idea to have a checklist of your equipment that you can check off before and after your wedding, making sure you aren’t leaving anything behind.
- Format and pack your memory cards: Have you ever gone to a shoot without a memory card? Or realize last week’s shoot is on there, and you don’t remember if you have transferred them to your computer? I have, and it is not a good feeling – do this all before.
- Fill up your vehicle with gas: its hard to get to a location when you find out you may have to walk. I like to leave a little early just in case of traffic, but many times I have realized I needed to fill up before I left.
- Have several copies of directions, contact’s phone numbers, and timelines: In case you lose one, or your gps dies, its nice to have backups. You will see me preaching a lot about backups, which is the Eagle Scout in me – Be Prepared.
- Get someone to help you out: Having an assistant and/or second shooter is a huge benefit to both you as a photographer and for the couple. I tell my couples not only will it give them different angles, but it will give them better photos because I will have someone to help me out. That added security you get from having someone have your back is a huge plus,and something I do not plan to stop providing for my couples. Even if its only a friend, girlfriend, or another photographer, having someone along is a HUGE help.
- Do an engagement shoot: I know this sounds like an odd thing to put in the getting ready, but it really does prepare both the photographer and the couple for the wedding. I love doing them, and I get a good feel for what the couple is comfortable with, what poses work best, and their overall relationship. You can often mimic the romantic session with the engagement session, but use what works best, and take into account the change in attire.
- Find a good camera carrying system that you are comfortable with: You will be carrying 1-3 cameras on you the entire day, several lenses, flashes, and other items for 6+ hours without much of a break. Find something that works well for you, places the weight in strategic places on your body to help minimize the soreness you will experience the next day.
- Sunscreen: If the wedding is outside/on the beach, apply sunscreen before you leave, you will not have time to do it during the wedding.
Those are a few tips that I feel will help get you ready, next is photographing the wedding itself. Here are a few overall tips:
- Shoot in RAW format: Even if you don’t know how to use RAW, shoot it anyways. You can convert it to JPG easily using free software, and if something gets biffed real badly, you have more leeway in post production. This will take at least double the space on your cards though, so keep that in mind.
- Make sure you eat and stay hydrated: Things get hectic and it is easy to forget to eat and drink. Try to keep that in mind to allow you to continue working.
- Do not be afraid to shoot a lot: It is easy to delete bad photos, but impossible to get those shots you never took.
The wedding is normally broken up into several parts, girls getting ready, guys getting ready, first look (sometimes), ceremony, family portraits, intimate/romantic portraits, and the reception. Lets look at each one a bit more individually.
Girls getting ready/Bridal party photos.
I normally spend a lot more time here than I do with the guys, as usually it take a bit longer. I am not going to give a straight shot list, but these are things I try to get.
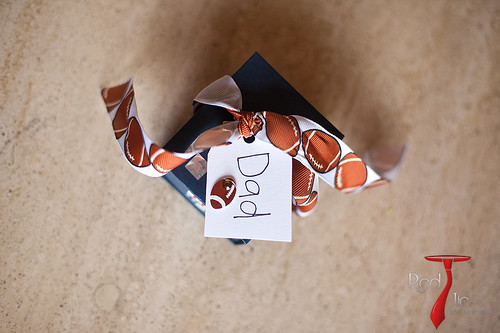
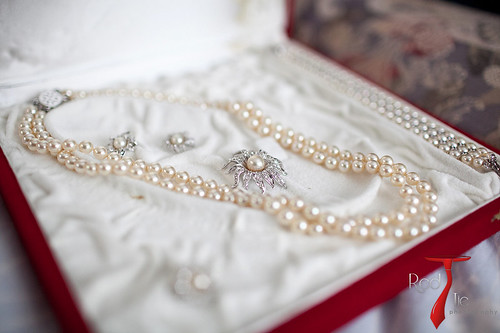
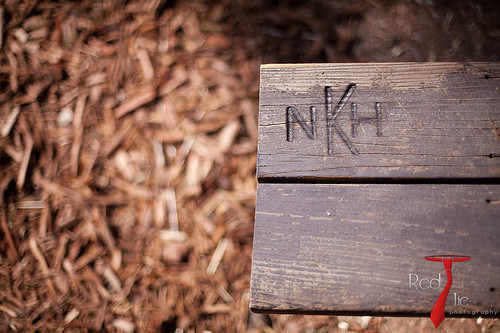
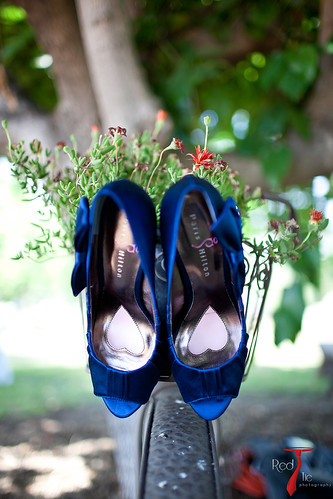
- Look for small details: I like to get some close-up shots of things around the room, like make-up, gifts to or from the bride, shoes, jewelry, etc. I also like to ask the couple to have the rings with the girls in the morning, and if there is time I like to shoot them here. Although I will also try to get them at the reception, nice natural light makes for nice variety.
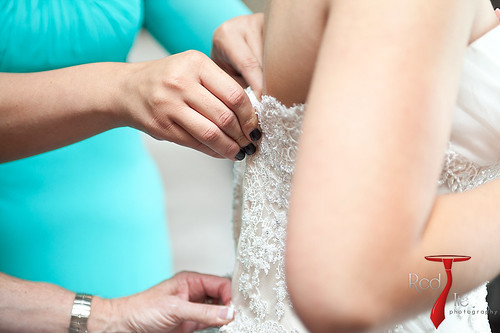
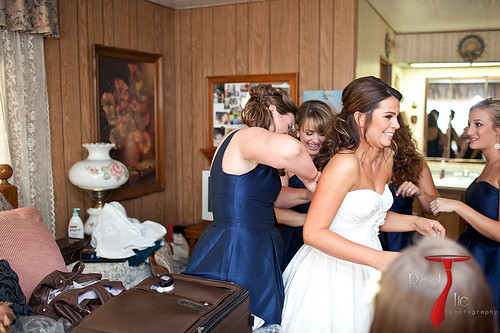
- Putting on the dress: At this point I will step out of the room and wait until the bride is comfortable where I will walk back in. Before I do this though, I like to set up the shot. Be mindful of the background and the light coming in. Ill try to place the bride in the middle of the room, in front of the large sliding glass door if there is one, and place the bridesmaids behind her. This gives a great interaction in the photos, and starts getting everybody ready for photos.
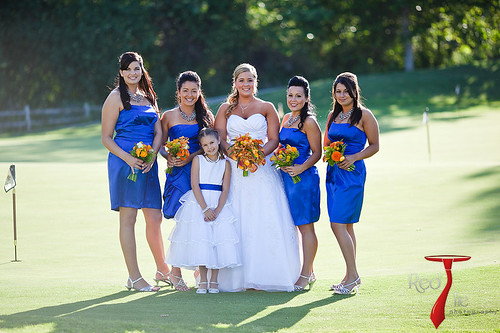
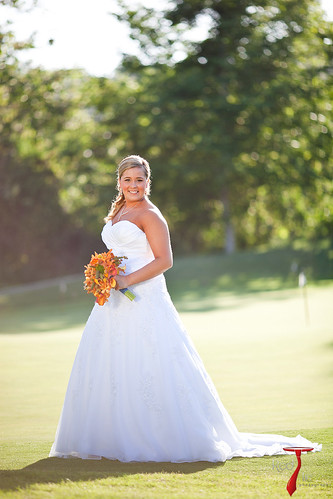
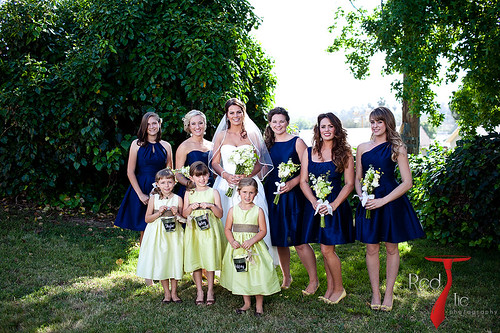
- Taking the girls out for photos: Hopefully there is time to do bridal party photos, and at this point I will bring them out to a location close by to get some photos together. I have learned that different groups like different things, so although I will give a few ideas, I rely heavily on their ideas. Once you throw out a cheesy idea that gets shot down, it rocks confidence and people start doubting you (at least I feel they are). I also like to try to back light the groups, and fill them in with either a flash, strobe, or reflector. Make sure you do a few group shots, but also the bride with each bridesmaid. Bridal portraits are also important, but normally the light is quite harsh around this time, and I will reserve those for later.
I have all of my lenses accessible in my main bag, but I usually pack a few lenses in my shoulder bag for quick and easy access. I thought sharing which lenses I pack may help out. So, for the gear I pack in my bag:
- Canon 35mm f1.4L
- Canon 50mm f1.2L
- Canon 70-200mm f2.8L IS II
- Flash or 2 (580ex2 and my Quantum Turbo)
- Extension Tubes: these are great to use for the rings and small details I mentioned earlier
Guys getting ready and bridal party photos.
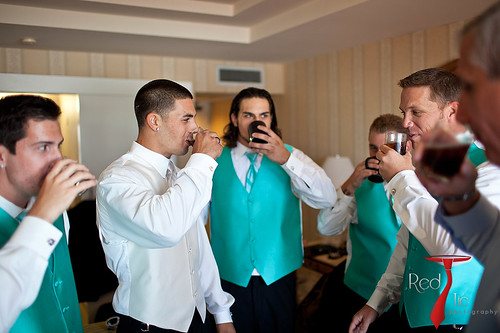
Guys usually go much quicker than the ladies because there is much less prep. Many times I get there the guys are already dressed. I try to get similar photos as above.
- Small details: normally the aren’t as cute, but details really even out wedding coverage. Look for interesting shoes, socks, cufflinks, ties or pocket squares etc. Normally you can get a nice shot of some sort of alcohol in the room.
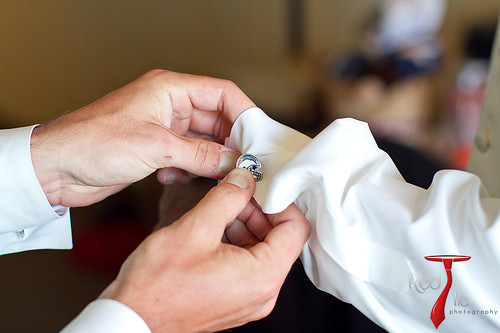
- Shots of the groom: Or should I say photos of the groom (sometimes you need to get shots of the shots though). I like to get a few of these, and they normally have to be posed. Adjusting the tie, fixing the cufflinks, tying shoes, and looking out the window. Make sure to find good light, and have a clean background behind.
-
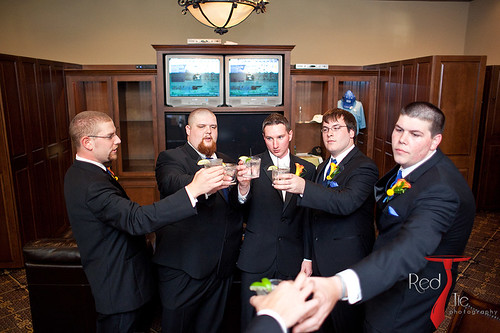
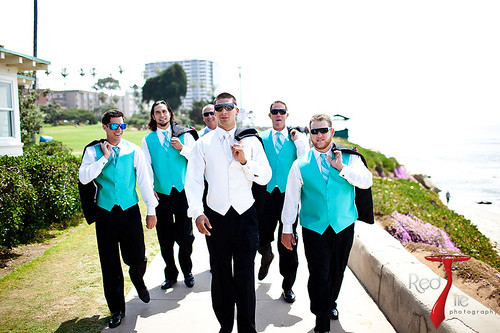
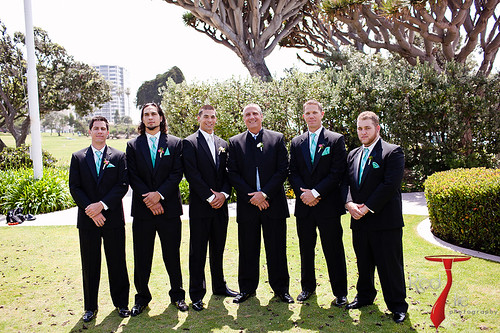
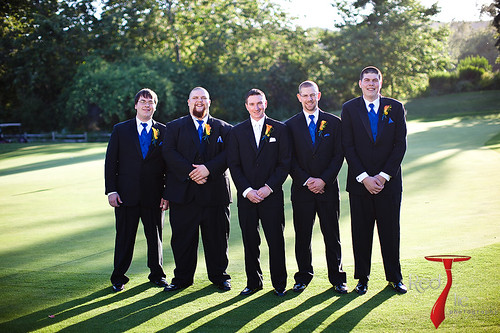
Bridal party shots: I try to take the guys the same place I took the girls for continuity. Start with the individual shots with the groom and each groomsman, and then do some of the formal shots. Sometimes people need to loosen up, and this helps. I tell the guys the same thing I told the girls, and look for their suggestions.
- Like with the girls, my ideal spot is somewhere which is backlit and has a somewhat dark background, this helps them really pop.
Equipment I pack/use most often:
- Canon 24-70mm f2.8L
- Canon 70-200mm f2.8L IS II
- Canon 35L or 50L
- Flash or 2
First Look
Many photographers like when there is a first look, and I am no exception. The intimate time between a bride and her groom when they see each other for the first time, when they can look, hug, kiss, embrace their partner and be alone (except for the photo and video guys that is). It makes for some great photos, and also frees up a lot of time. This way the photographers can get bridal party and sometimes family portraits done before the wedding, and frees up more time during nicer light to be with the couple and for them to enjoy their cocktail hour if they please. I use this time to let them be them, and do not pose or direct them besides the initial setup. Here are a few things I do.
- Find good light and backgrounds: I find this challenging many times, because this is often done midday and you run the risk of having harsh, direct light. Try to find a nicely lit place, preferably in some sort of shade, with backgrounds that aren’t too distracting. I know this is asking for a lot, but we are working for ideal, right?
- Set the groom in the spot you want them to meet, and have the bride come from behind: I love the anticipation of the groom as he waits for his bride, as I stand in front and eagerly snap photos as she walks up behind him, the tap on the shoulder and the instant look of relief, joy, love and appreciation on their faces. Sometimes I will tell the bride to tap him on a certain side, depending on the light and the backgrounds, but often this is their time.
- Use a long lens: I don’t want to be right in their face, so I will take a long lens and give them some room. This will also help separate them off from the background when I am shooting at wide apertures (f2.8) and make some backgrounds less distracting.
- Let the couple have their special time: This time is not for me to direct, its for them to see each other, all dolled up, on their wedding day. After I will often take the couple to do a few photos, but this time is for them. Depending on the couple, this session can take anywhere from a minute to 20, so be mindful and budget your time accordingly.
Equipment I pack/use most often:
- Canon 70-200mm f2.8L IS II (my most used lens for this part)
- Canon 35mm f1.4L
- Canon 50mm f1.2L
Ceremony
This is a time where it is really nice to have two shooters, and I am going to assume that you were able to beg/bribe someone to help you out, so these tips are how to shoot a ceremony with two people.
- Placement before the wedding ceremony starts: I like to place one shooter up front, kneeling on the bride’s side (the left side normally) to get the bride being escorted down the isle by her father. At this point I will also have another shooter in the back, getting things with a long lens (like the groom’s expression) and shooting wide to get the entire ceremony in the shot. Sometimes I also like to get the ceremony and reception site when it is empty (without people) but that doesnt always happen.
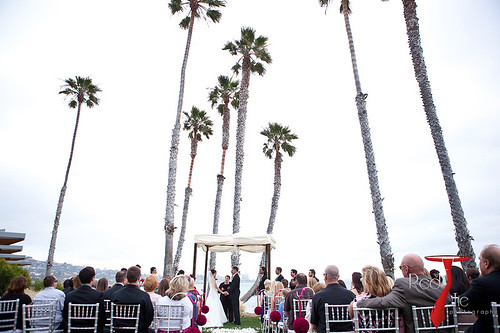
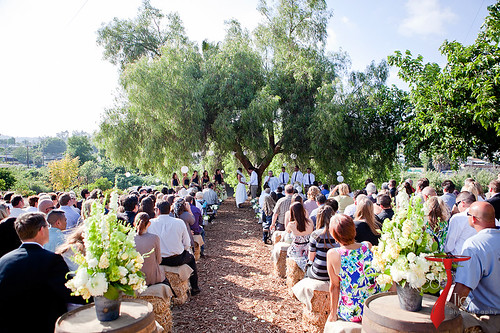
- During the ceremony: I like to move around a bit during the ceremony, discretely that is. My second shooter and I will be watching each other, and try to mirror our placement (If I am midway up on the outside right, they are midway up on the outside left). As the ceremony comes to an end, I will place one of us in the isle, just in case things get going quickly and the kiss randomly happens. Depending on where the ceremony is, it is not always feasible to get many different angles, and if that is the case try to at least be at different focal lengths.
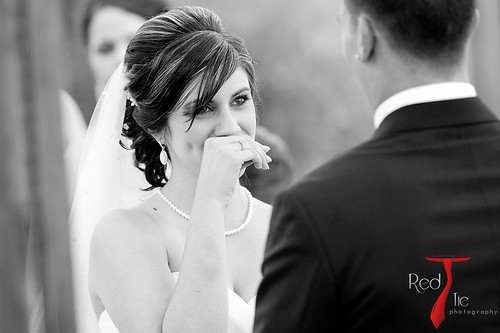
- Catch reactions: I always try to get the parents during the vows, or friends and family wiping away tears or laughing. These types of shots really bring life into the wedding, and show the emotion that was there.
-
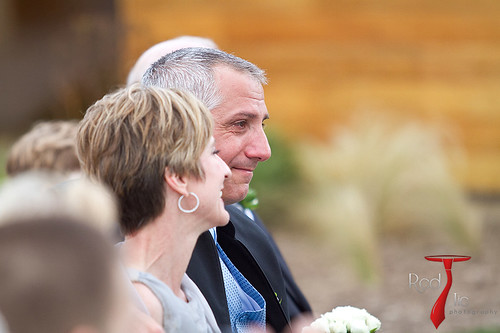 During the vows: Again, I try to stay on the opposite side of my second shooter, but at the same angle so we are not in each others shot. If there is only one shooter, then I try to get the person who is having the vows said to them, as to not get odd faces while they are talking.
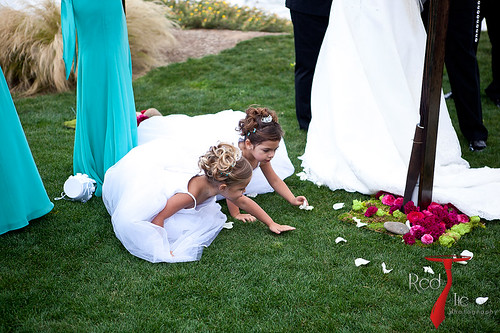
- Watch the children: Sometimes they get antsy and do some cute things. Just don’t get carried away with it.
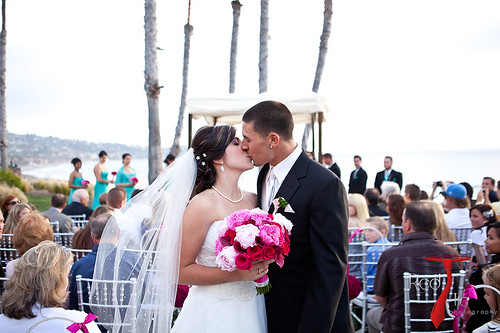
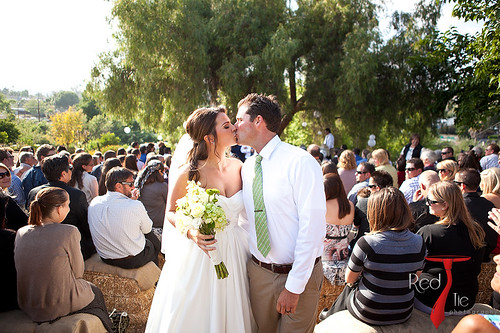
- Recessional: At this point I will hopefully be down the isle, and get a shot of the bride and groom towards the end of the isle. I tell them to lean in and kiss, and get a great shot with their guests behind them. This is one of my favorite shots I try to do as often as possible.
Equipment I pack/use most often:
- Canon 24-70mm f2.8L
- Canon 70-200mm f2.8L IS II
- 15mm f2.8 Fisheye (rarely)
- Tokina 11-16mm f2.8 (sometimes)
Family Portraits
Most of the time, now that I have my strobe, I will set up my strobe off to the corner, ready to go before the ceremony starts. This way, I will be able to get up and ready in a matter of seconds, and will often have my second shooter fetch it while I am getting people situated. Here is how I like to run my family portraits.
- Pick a spot close by: I like to do the family formals often right where the ceremony took place. It is too difficult to move that many people too far, so I find the best light/background and post the family there. Often I will use my strobe to fill the group in.
- Get a list: This is extremely important, and will streamline this process for you. Although I do not guarantee shots, it helps to have names. I also like to have someone with me (a family member) that knows who the people on the list are and can help me organize them for the next shot.In addition to names, I like to have associations with them, so the list comes out something like: June (Grandma), Bob (Uncle), etc.
- Put the bride and groom in the center, and build off of them: You want to try to keep the group symmetrical, keeping both sides with about the same number of people. Don’t feel the need to get too creative, and arrange them tallest to shortest, but if you have to make 2 rows, then put the taller people in the back.
- Start large, get smaller: I like to pick a side – either groom or bride – and start with the largest group we have, then cut away at it. This gets more people out of the way and on to the party. Trust me, people will like this.
- Get grandparents done quickly: After my large group shot, I take everyone out except the grandparents. This allows them to go back and sit down, relax, and not have to stand in the heat the entire time.
- Get done quickly: This isnt a part of the wedding where you will have a lot of time to get things perfect, or arrange people artistically. Speak with a large, authoritative voice and get people arranged. Make sure you can see them and the lighting on them is relatively even.
- Take several shots with the same focal length: This really helps when people are looking away or blinking and you can swap their head in Photoshop. I don’t like the idea of “Ill just get it right in Photoshop” but with large groups, sometimes you do not have a choice. Again, take quite a few shots, re-focusing after every one/few shots.
- For big groups, have them point their belly buttons towards the middle. It makes the group look not too spread out and gives a good feel to the photo.
Equipment I pack/use:
- Canon 24-70mm f2.8L
- Canon 35mm f1.4L
- Strobe and umbrella with my triggers
Intimate and Romantic Portraits
This is my favorite part of the wedding. It allows me to be creative, and is often during the best light of the day. This is what you will be showcasing on your website, and what many couples will book because. There is too much to put into this blog post on posing ideas, but I will give a few tips.
- Watch the clock: If the wedding is running behind, this is usually the first place people see to cut it. Keep an eye on timing when you are doing group shots too, because the more time you take up there, the less time you will have for this portion.
- Take only the couple: I like this to be their alone time (with me that is), so I do not recommend others coming along, this includes, but is not limited to: bridal party, parents, cousins/friends/uncles with cameras, etc. Having others along will slow you down, limit creativity, and many times make the couple self conscious. OF course, I bring my second shooter with me to help out, and I prefer it to be just the 4 of us.
- Bring a flash: Many times this will happen as the sun is setting, and although there is plenty of light when you start, it can fade quickly and you may want to get some sunset photos with the couple being lit as well.
Equipment I pack/use most often:
- Canon 70-200mm f2.8L IS II
- Canon 35mm f1.4L
- Canon 50mm f1.2L
- Canon 24-70mm f2.8L (rarely)
- Flashes and/or strobe with diffusers
Reception
Going from the romantic session to the reception can be the most hectic time, especially if the couple goes right into the first dance after the grand entrance. I like to set up off camera lighting, so it is often a rush to do this. Just be aware of that.
- Store your gear in a safe place: Often times this is with the DJ or in the corner of a room. You don’t want your equipment walking off in the middle of the wedding. Even though it is all insured (right?), it would still put a damper on things.
- Befriend the DJ: The DJ is going to be the one running the reception, and will be the one to let you know before things are announced. Things like cutting the cake (so you can get a good spot), or the garter/bouquet toss (so you can get your lighting ready), or any other major event. Not only will they be watching your stuff, they can make the reception so much nicer for you by warning you ahead of time. Once things settle down, I try to ask them if I can get them a drink at the bar (soda or water).
- Know the schedule: Goes with knowing the DJ, but be prepared and know if things are running behind.
- Be prepared to leave your meal: Sometimes toasts happen in the middle of the meal, so just be prepared at any minute to grab your gear and run out to the dance floor. Most of the weddings I shoot, I am put into a different room than the reception, so sometimes you wont know something is going on. So, once again, befriend the DJ.
- Take the couple out during the reception: These are some of my favorite photos from most of the weddings. Taking some off camera flash and getting the bride and groom after they have relaxed a bit can be awesome for photos.
Equipment I pack/use most often:
- Canon 70-200mm f2.8L IS II (speeches and toasts)
- Canon 135mm f2L
- Canon 35mm f1.4L
After the wedding
There are even steps after the wedding, and I am sure this blog post will look like the work afterwards is less, but it often works out to be at least double the time you spent at the wedding. We have established that you have an editing workflow in the beginning of this post, so I am not going to go over that. But here are some less-obvious tips.
- Stretch: I try to do this before I leave the wedding. If I don’t stretch before I drive home, I get really stiff and sore. This will help your soreness the next day.
- Backup your images: Ok, pretty obvious. This is a necessary step, and cannot be overlooked. The more places you back them up, the better. You need at LEAST 2 copies, but the more you have in different places, the better you will be protected.
- Schedule a massage: I like to get one about once a month to relieve some stress and relax. Its interesting, during the busy season I can shoot 3 weddings in a weekend and be less sore than shooting the first wedding of the season. I guess it is what you are used to.
- Make a timeline for your editing process: Set deadlines when to edit, and meet those deadlines. It will keep you on top of your game.
- Try to be prompt with your delivery: Delivering in a day is not necessary, but try to keep it prompt. This is one thing I am continuously working on improving.
I know there is MUCH, MUCH more to say for each category. I plan to continuously add to this post, and I will differentiate it by adding the date on each new bullet. If you have anything to add, leave a comment and I will try to work it into the post.
Filed under: Tips and Recommendations, Tips for photographers